I enjoy a small project or two between bigger crochet and knit projects. My box of orphan balls of yarn always calls out to me with a new project idea. As mentioned when I published the basic pattern for a little crochet pouch, I love containers. I like to make containers for just about any purpose and here is the basic pattern for another one in my series of pockets, pouches, and purses.
These little "pockets" are great to keep a few tissues fresh in your purse, a place to keep all of those discount cards separate from your credit cards in your wallet.... Make your pouch a little taller and you have a glasses case, digital camera, or cell phone holder. Play around with a few fancy stitches and you've experimented with new stitches while making something truly unique. Add a strap and you have a little purse for a little girl (see image); add a key holder clip and you can clip it to your purse or belt loop (pattern coming later for this.)
Make the whole project bigger and you have a purse for yourself. These sell well at craft fairs, make little gift pockets, party favors, or a little something personally crafted to give with a birthday card.
Enjoy,
Lois
-------------------
Pocket
J hook
A small amount of #4 yarn
One 3/8" button.
Notes: This easy little project is great for experimentation as seen in the images. As long as your stitches are snug, you can change the yarn, hook, and number of stitches to make your project truly your own. If you are an experienced crocheter, this is also a good project to teach to a new crocheter.
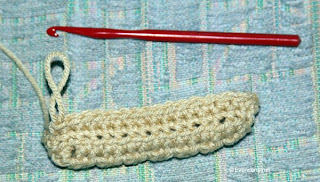
Chain 5
Row 1: sc in second chain from hook and in next three chains (4 sc), ch 1 turn
Rows 2 - 14: sc in each st (4 sc).
Do not break off.
Sides:
First round of sides: ch 1, turn, 2 sc in first sc, sc in next 2 st, 2 sc in last sc. now working along side of bottom, sc in end of each row to next corner, 2 sc in corner, 1 sc in each of next 2 st on end, 2 sc in next corner, sc along other side of bottom, do not join, do not chain 1.
Second round of sides: Working in back loop only, sc in each st around (no increases in corners)
Third and subsequent rounds of side: working in both loops, sc in each st for 2.5 inches or height of sides desired.
Row 1: At end of last long side, just before corner, ch 1, turn, sc in next 14 st, ch 1, turn.
Rows 2 - 6 : sc in each st, ch 1 turn.
Row 7: sc first 2 st together (dec made) sc across row, sc last 2 st together (12 st.). ch 1, turn.
Row 8: sc first 2 st together, sc in next 3 st, ch 2, skip 2 st, (button hole made) sc in next 3 st, sc last 2 st together. (10 st.) ch 1 turn.
Row 9: sc first 2 st together, sc in next 2 st, 2 sc in chain space, sc in next 2 st, sc last 2 st together. (8 st) ch 1, turn
Row 10: sc first 2 st together, sc in next 4 st, sc last 2 st together, (6 st) break off.
Weave in ends.
Sew button below button hole.
Did you try this one? Please click "comment" below and tell me about it. Comments are always welcome.
---------------------------------
Here is the basic pattern for pouches in my series of pockets, pouches, and purses as seen in the image below:
~~~~~~~~~~~~~~~~~~~~~~~~~~~~~~~~
~~~~~~~~~~~~~~~~~~~~~~~~~~~~~~~~


No comments:
Post a Comment