About this Blog: Bread making recipes, knit and crochet projects, wood working, gardening, digital imaging, travel, cruise ships, Labrador Retrievers, and more....

About the Header Image: Idlebrook Wendy Darling Evensen "Wendy" one of our four Labrador Retrievers.

Click the header image to see most current posts.

Sunday, January 31, 2010

Happy Birthday to Penny!


Penelope T. Labrador AX, MXJ, OF
CPE CL-1, CL2-R, CL2-H, CL2-F

Happy Birthday to Penny!

Good morning,

That beautiful, "smiling" Labrador Retriever in the image is our Penny; she is one of two fabulous Labs who live in our home. Not only is she pretty and sweet, she is a canine athlete who has won numerous agility titles with her trainer/my daughter, Catherine. Penny and Catherine spend a great deal of time training, but don't tell Penny. She is convinced it is all play.

Penny gets up each morning and asks, "What can I do for you today?"

Photo credits for this picture go to Catherine.

Please join us in wishing Penny "Happy Birthday Number Five!"

Lois

~~~~~~~~~~~~~~~~~~~~~~~~~~~~~~~~~~~~~~~~~~~
~~~~~~~~~~~~~~~~~~~~~~~~~~~~~~~~~~~~~~~~~~~

Saturday, January 30, 2010

Majesty in the Sun

 Good morning,

I love pictures of ships. Not only are ships beautiful, they always bring thoughts of wonderful times on board.

I took this image of Royal Caribbean's Majesty of the Seas at anchor off the island of Coco Cay in the Bahamas from the tender boat. Guests are tendered between the ship and shore for a day in the sun at the beach.

What a glorious day to be cruising!

Lois

~~~~~~~~~~~~~~~~~~~~~~~~~~~~~~~~~
~~~~~~~~~~~~~~~~~~~~~~~~~~~~~~~~~

Friday, January 29, 2010

Knit Patchwork Sweater Inspired by The Cat in the Hat


Good morning,

As promised yesterday, here is my sweater design inspired by a sweater the grand kids and I saw in The Cat in the Hat movie. That famous cat wears a sweater during an "infomercial" that is similar to what I have designed. While watching it with the kids, I said, "There's a neat sweater." The kids agreed so my task was clear. I have made six of these now: 4 for the youngest grand kids, 1 for my grand niece, and 1 for a friend's grandchild. Of course, each sweater is different. I used a swatch to get my gauge right. After making the first sweater, I was on a roll for the rest. I used my measurement chart to get the size right for each child.  See yesterday's article for more information about measurements.

The comments on these are overwhelmingly positive and they are so much fun to make. I simply group yarns of like content and weight in pleasing color combinations and start knitting. The color changes are somewhat, but not totally random as I "play" with the combinations lining them up and seeing how the sweater parts will match up as I go. I do make some "rules for the game" about how big the color patches are and in what direction I will "tilt" them.

The bottom band, neck band, and cuffs are always one color that is not used elsewhere in the sweater. It's a fun project and never gets dull. To make color changes it is important to twist the yarn of old and new colors on the back side to be sure no hole forms where the colors change. The colorful images of my youngest grandson wearing the Cat in the Hat inspired sweater were taken while he was building a Viking Ship with his grandfather/my husband.

I would love to hear from you.  Comments are very welcome.

Enjoy,

Lois


~~~~~~~~~~~~~~~~~~~~~~~~~~~~~~~
~~~~~~~~~~~~~~~~~~~~~~~~~~~~~~~

Thursday, January 28, 2010

How to Get Those Pesky Measurements Right - Knit and Crochet


Good morning,

I wasn't able to be in the same city with the kids for Christmas a couple of years ago, so I was so happy my daughter-in-law sent me a picture of all of the kids together wearing their "knitted by Grandma" outfits. Are they darling children or what? OK, I'm grandma so you know my answer to that question. :-) <-- Proud Granny smile.

I designed and made the jumpers and sweaters in the picture above while the kids were thousands of miles away. The girls are wearing blue sparkle yarn jumpers knit in the round to the underarms; the white shirts and tights are purchased. The boys' matching pull over sweaters are knit in a basket weave stitch. I allowed for plenty of ease in these garments and the children were able to wear them for two years of Fall, Winter, and into Spring. The green popcorn pattern sweater to the right is another of my designs, this time in crochet.


The knit pink dress was designed from afar, too, by using my measurement charts (see below for chart). It is knitted in the round with three needle bind off seams at the shoulders and buttons in the back for easy on and off. It was pretty easy to make and very well received.

Most of us who have made garments for ourselves, family members, and others at some time have experienced the frustration of the results of all of our work not fitting the person the way we had hoped. We learn early in our hand knitting and crocheting careers to measure carefully and read through patterns before we start. There is no excuse to avoid making a swatch to check your gauge before you start. Those swatches can be ripped for the yarn to be used again, or they can be set aside to make a different project. Someday I'll share my "Picasso" afghans that are free form designs, many of which incorporate swatches I made before making other items or my "design musings" as I put to yarn what appeared in my head.

So, now you've made your swatch so you know if the gauge is working well if you are following a pattern that is not your own. Measure to count at least four inches of numbers of rows and number of stitches to be able to do the math to be sure what you make will turn out to be the size you expect it to be.  Feel the resulting swatch and stretch it a little. Do you like what you feel? Is the fabric as thick or thin as you want? Hold up the swatch and wiggle it a little.  How do think it will drape?  Does the pattern stitch look the way you thought it would? With a little practice at this, you'll be able to predict results fairly accurately.

If you're making something for an adult and unless you know your recipient well, it's a good idea ask if a hand made item is something they would like. If so show him or her the swatch you've just made and the picture of the finished garment you plan to make.

If you are designing the item yourself, talk about the design you have in mind, color, fit, and perhaps a little drawing of what you plan to make. There are so many people who would love to have something hand made that it makes sense to knit or crochet only for those people. If someone isn't interested in a hand made item, just smile, calmly say, "OK," and change the subject.  Then make an item for a different family member, for a homeless or military person, to donate to a charity, or for yourself. Those people, including yourself, will truly appreciate the time and love that you put into your work.

There are plenty of places on the Internet or in magazines to find measurements for standard sizes, but how many people do you know who are really "standard?" Measuring to make garments for those in your family is not as difficult as it may seem. Since I make many items while away from home I can't just grab the recipient as he or she is walking by and hold up a sleeve or try on a hat as I did when the kids were small. Now I have to do the measuring in advance. I have developed a simple form that I update a couple of times of year for my husband, kids, grand kids, and friends. The kids and grand kids gladly line up to do this and the older ones help the younger ones with the very quick process. I am fortunate to have three granddaughters (includes a set of twins) who all wear the same size. It sure cuts down on the measuring!

You're welcome to download and print the .pdf format measurement form by clicking here. I've added measurements to the form as I have made different items through the years; you may want to add even more or rearrange the whole thing. It's easier to know the measurement of a granddaughter's waist to knee than to send emails in the middle of the night and wait a day or two to get the measurement so I can finish a project. Measure loosely, remember that kids grow, and design/make your items with one, two, or more inches of ease depending on how tight/loose the garment is to be and what might be worn under it.

Now that you have your swatch and measurements, you can put pen to paper or fingers to keyboard and do the math to design your own garments.


Tomorrow I'll share images and more information about a sweater I designed that was inspired by the Cat in the Hat movie.

Comments, questions, and suggestions are welcome.

Enjoy,

Lois

~~~~~~~~~~~~~~~~~~~~~~~~~~~~~~~~~~
~~~~~~~~~~~~~~~~~~~~~~~~~~~~~~~~~~

Wednesday, January 27, 2010

Niagara Falls At Night


Good morning,

My husband I recently visited Niagara Falls for two days so had the opportunity to take images both day and night from both sides of the Falls.  We have both enjoyed photography since we were children and continue to share the passion with digital cameras.


The spectacular lighted view of the American side of Niagara Falls at night is made possible by a bank of high powered lights on the Canadian side of the Falls.


The observation platform where I was standing to capture the night image can been seen beyond the Falls and extends well out over the Niagara River.

The camera used for all of these images is a Canon Rebel. Since then I have gotten a Canon 50D and look forward to visiting the Falls again to capture images with it.

My husband and I have had two enjoyable trips to Niagara Falls to capture the images since 2001. Images are always our favorite souvenirs wherever we travel. Click here to see images I took way back in 2001 with now seems to be a very primitive digital camera. Those first cameras did very good jobs in their day, but they had very limited capabilities compared to the cameras of today.

For those who enjoy capturing as well as viewing spectacular images, I hope you enjoy these.

Comments are always welcome.

Lois
 
~~~~~~~~~~~~~~~~~~~~~~~~~~~~~~~~~~
~~~~~~~~~~~~~~~~~~~~~~~~~~~~~~~~~~

Monday, January 25, 2010

Men's Belly Flop Contest - Royal Caribbean's Majesty of the Seas


Good morning,


If you are a regular reader you know I spend a lot of time traveling and and much of that travel is on cruise ships.

Today's images of the Men's Belly Flop Contest aboard Royal Caribbean's Majesty of the Seas are just plain fun.  The guys who volunteer for this event are cheered on by those around the pool.  Cruise Staff records the rankings by the audience to determine the winners. The winners receive large medals that they generally wear around their necks for the rest of the cruise.

Surprisingly, sometimes it's the slimmer guys who make the biggest splashes!

I happened to be walking on deck 12 when this event was starting so I stopped and took lots of pictures. I didn't have a "big camera" with me, but I did have my Sony Powershot "baby camera" in my pocket. That camera did a great job of catching the action. These are just a few of the more than 100 pictures that I took.

If it is a cold day where you are today, perhaps these pictures will bring a warm smile.

Enjoy,

Lois

 ~~~~~~~~~~~~~~~~~~~~~~~~~~~~~
~~~~~~~~~~~~~~~~~~~~~~~~~~~~~

Sunday, January 24, 2010

Spring Outfit for 18" Doll - Part 2 of 2 - Crochet Hat


Clothing for 18" Dolls is available for purchase at


Knit and crochet patterns to make clothing for 18" Doll are also available.
~~~~~~~~~~~~~~~~~~~~
~~~~~~~~~~~~~~~~~~~~

Saturday, January 23, 2010

Spring Outfit for 18" Doll - Part 1 of 2 - Crochet Poncho


Clothing for 18" Dolls is available for purchase at 


Knit and crochet patterns to make clothing for 18" Doll are also available.

~~~~~~~~~~~~~~~~~~~~
~~~~~~~~~~~~~~~~~~~~

Friday, January 22, 2010

Shop for Yarn, Needles, and Hooks Wherever You Go

Good morning,

My mother gave me some wonderful antique needles and hooks that are the basics of my treasured collection. I add to that collection by visiting yarn and needlework shops when I travel. My husband, Kjell, is an absolute gem by helping me find some very out of the way places. Today's musings and images bring back many wonderful memories of adding to my yarn stash and the items I have made with yarn, needles and hooks we have found in many areas of the world.

We wandered through a shop in a large upscale shopping area in Malaga, Spain, near the port, but didn't purchase anything. Not only were there no content labels on the products that had unusual and unpleasant odors, I was concerned about the dye being colorfast and/or toxic. It was fun, though, to see and touch the very different offerings in that store.

In Tønsberg, Norway, the oldest Viking town in Norway and where my husband was born, we visited a few different yarn stores: at one I purchased a large bag of Norwegian cotton; at another I purchased a specialty crochet hook. We were in both of those stores looking for antique bone hooks or knitting needles, but no luck. We visited several sweater stores and purchased sweaters in other Norwegian cities and towns: Oslo, Bergen, FlÃ¥m, HonningsvÃ¥g, and others. If anyone knows how to make beautiful things with yarn, it is the Norwegians. Helsinki, Finland and Tallin, Estonia, are other places to find gorgeous hand made sweaters and the yarn to make them; the shop pictured in the image above is only one of many, many sweater shops in Tallin.


In Civitavecchia, Italy, the port city to Rome, we purchased Egyptian cotton and crochet hooks at an outdoor street market.  I designed and made the outfit pictured on the 11-1/2" fashion doll to the right with some of that cotton; that doll and others are for sale here. In the Port of Villefranche, in the South of France, while our husbands were working, a friend and I took a city bus over to Nice to visit a yarn shop we located via the Internet. Sadly, we were very unimpressed with the French shop full of dirty, worn merchandise.

In Santos, Rio de Janeiro, and other cities in Brazil for several weeks Kjell and I never did find a yarn/needlework shop although we were assured they were there by the Priest from the Norwegian Seaman's Church in Santos. While giving us an insider's tour of Santos, he told us it wasn't safe for tourists to go outside the tourist areas and we took his good advice to pass on yarn shops in Brazil.

While cruising the waters of Eastern Canada we found many, many art, craft, and yarn shops, sometimes right at the ports, where yarn supplies and the products of talented artists were for sale.

Back in the good Old USA in Bar Harbor, Maine, my husband and I walked a couple of miles capturing digital images of gorgeous fall foliage to a yarn shop where we purchased beautiful wood-turned crochet hooks. Since then, my husband, a Maritime Marine Engineer who turns wood as a hobby, has made exquisite crochet hooks and needles for me. When we left the Port of Galveston, Texas, to drive to Cincinnati a few years ago, we set the GPS to Big Sandy, Texas, where we stopped in to see Annie's Attic. What we found was a darling little store out on a country road with creaking wood floors and merchandise tightly displayed in two or three small rooms. The lady there said they have a large warehouse nearby where they ship all the items that have been available by mail order from Annie's Attic for years. I bought some beads, large spools of embroidery ribbon (I knitted and crocheted with it - fantastic!), and crochet hooks. It was fun to walk through the very old country store that is at the home address of a very large mail order business.


Last month I mentioned Kjell and I have often walked past a yarn shop in Key West, Florida, but it was never open when we were there. Yesterday I hit the jackpot as I went ashore to mail some items and buy shampoo while my husband was busy working. The shop is Knit Wits, 218 Whitehead Street, which is in the old downtown section of Key West. The lady eating her lunch when I arrived, presumably an owner, told me it is the only yarn shop within 200 miles. Although there is not a great volume of yarn displayed, there is a wonderful variety of specialty yarns. It was worth the stop to look around and I purchased three hanks of yarn that you see in the picture. The larger hank on the right is Conilette Jitterbug made in Wales; it's a sock yarn and includes a pattern on the label. The green/white Linen Tweed is from Universal Yarn, Inc., and is made in Turkey.


What will I make with these new additions to my yarn stash? I'm not sure. I rarely buy yarn for a specific project, but ideas flow as I visit my stash in the "yarn room" at home or the yarn I have with me while I travel. I buy yarn when I see something I really, really like and eventually, I make something that I really, really like with it. Hmm, I wonder what I should make with this pretty pink yarn today....

Of course, I have favorite haunts for yarn purchases closer to home, too. Shop for yarn, needles and hooks wherever you go. You won't be disappointed.

Lois

~~~~~~~~~~~~~~~~~~~~~~~~~~~~~~~~
~~~~~~~~~~~~~~~~~~~~~~~~~~~~~~~~

Thursday, January 21, 2010

Crochet Circle Back Sweater for 18" Doll

Good morning,

Here is another sweater for my 18" doll, Ginger.  This one looks as if it could be a shrug from the front, but a sweater from the back. Ginger is wearing it over a sleeveless jumper knit of the same yarn.

As with all patterns, be sure to read through the directions completely before starting. 

Comments are welcome!

Lois

Crochet Circle Back Sweater for 18" Doll

This is an intermediate skill crochet pattern.

Size H hook, about 2 oz. #3 yarn main color (MC) and a small amount of contrasting color (CC) for border. 7/8" button. The main color in the sweater pictured in image is Wool-Ease sport yarn.

Ch 2 counts as first dc throughout. Join all rounds with ss. Increases are made in top of increase of round below.

Back:

With MC, Ch 4, join with ss.

Round 1: 12 dc (12 st)

Round 2: 2 dc in ea stitch (24 st)

Round 3: 2 dc in same st, 1 dc. Repeat from * (36 st)

Round 4: 2 dc in same st, 2 dc. Repeat from * (48 st)

Round 5 - 8: Continue increasing in same manner as round 4. (96 st at end of round 8) Do not break off.

Right Sleeve

Round 1 of right arm: Chain 2 (counts as first dc), dc in next 16 st (17 dc made), chain 12. You'll now work right arm in the round from the right side only. Turn work and join chain just made with first ch 2 at beginning of round, be careful not to twist. Total of 17 dc and 12 chains in round.

Round 2, dc in each st of round 1 and in each chain. (29 dc)

Round 3 - 9 : work even in dc

Break off.

Left Sleeve

Round 1: With right side facing, skip 30 stitches on back, join with a ss in next st. ch 2, dc in next st, ch 12. Avoid twisting ch. Count 15 unworked stitches to right of joining, dc in that stitch and in next 14 stitches. join with ss, ch 2 do not turn (17 st and 12 ch in round)


Round 2: work dc in each dc and in each chain (29 dc)

Round 3 - 9 : work even in dc

Break off

Right front:

Row 1: With right side facing, skip first stitch and join with ss in the next stitch of front of right sleeve. ch 1, sc in same space, sc in each of the next 9 spaces. ch 1, turn


Row 2 - 6 : work even in sc

Row 7: sc 2 tog (dec made), 6 sc, sc 2 tog. (8 sc)

Row 8: sc

Row 9: sc 2 tog (dec made), 1 sc, ch 2, skip 2 st (button hole made), sc, sc 2 tog.

Row 10: sc 2 tog, 2 sc over ch st, sc 2 tog

Left front:

Row 1: With right side facing, skip first stitch and join with ss in the next stitch of front of left sleeve. ch 1, sc in same space, sc in each of the next 9 spaces. ch 1, turn

Row 2 - 6 : work even in sc

Row 7: sc 2 tog (dec made), 6 sc, sc 2 tog. (8 sc)

Row 8 sc

Row 9: sc 2 tog (dec made), 4 sc, sc 2 tog. (6 sc)

Row 10: sc 2 tog, 2sc, sc 2 tog

Border (read through note and detailed instructions before beginning):

Note: Border is worked with CC. Around left and right front, sc, increasing as needed around curves. Back of neck and bottom back pattern is *sc, skip 1 st, ch 2, repeat. "Corners" at underarm and shoulders are worked in dc with decreases to shape work appropriately.

Detailed instructions for border are given below:

With CC, from right side under arm, join with sc 4 st to left left sleeve, ch 2, skip one st, *sc, ch 2 skip one st. Repeat from * across bottom back until you have made 22 sc with ch 2 between ending with an sc. Dc into base of sleeve, skip one row of right front, sc in ends of next 9 rows. 2 sc in end st of front, 2 sc across end of right front, 2 sc in top st at end of front, sc across top of right front, skip last st , 3 dc in top of sleeve, sc in first st of back neck, **ch 2, skip 1 st. Repeat from ** across back of neck. 3 dc in top of left sleeve, skip first row of left front, sc in next st and to the end of the bottom of left front, 2 sc in end of bottom of left front, 2 sc across edge of left front, 2 sc in end st of bottom of left front.

Cuffs:

Round 1: with contrasting color, sc around sleeve, join with ss, ch 1

Round 2: *2 sc together, sc, repeat from * around. join with ss

Round 3: work even in sc. Break off. weave in ends.

Sew on button under buttonhole.

Weave in all ends.

More patterns and finished doll clothes for sale are ready to ship here in our on-line shop: 

 EvensensProductions.com

 Come over and take a look! 

Wednesday, January 20, 2010

Knit Shrug for 18" Doll

Good morning,

Today my 18" doll, Ginger, is modeling a very, very easy knit shrug.  She's wearing the shrug over a sleeveless jumper.

Although this could be knit flat and seams sewn for the sleeves, it's important to knit in the round. If made flat, seams will be to the front of Ginger's arms.

Comments? I'd love to hear from you.
Enjoy,

Lois

--------------------------

Knit Shrug for 18 " Doll

Quick and Easy

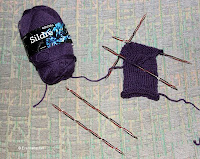
Materials:  Gjestal Sildre sport weight yarn, one 50 gr. ball
#7 dp needles

Gauge: 6 st x 8 rows = 1"

Cast on 32 st. and divide equally on dp needles

Knit in stockingette stitch in round being careful not to twist

First sleeve: knit 4". Cuff will roll naturally. Measure with cuff unrolled/flat.

Back: Knit back and forth in stockingette stitch for 5".

Second sleeve: Place marker and resume knitting in the round for another 4".

Break off, weave in ends.

~~~~~~~~~~~~~~~~~~~~
More of my patterns, knit and crochet items are available here:
~~~~~~~~~~~~~~~~~~~~

Tuesday, January 19, 2010

Atlantis Hotel Gardens - Paradise Island, Nassau, Bahamas


Good morning,

Today's images are of the Atlantis Hotel on Paradise Island in Nassau, Bahamas.  It's a short cab ride from the cruise ship port and worth the time to stroll through the gardens.  At the hotel you'll also find a casino where you can leave some of your money if that is of interest to you.  :)


The hotel complex includes high-end shops, gorgeous architecture, and a huge aquarium.  There used to be a lovely restaurant in the lower level of the hotel by the aquarium, but that restaurant has been closed of late.  Perhaps when the tourist season picks up again it will reopen.


And, of course, here is a view of the beach at the hotel and blue ocean beyond.  Ah, yes.... 

Enjoy,

Lois

~~~~~~~~~~~~~~~~~~~~~~~~~~~~~~
~~~~~~~~~~~~~~~~~~~~~~~~~~~~~~

Monday, January 18, 2010

Candy Bouquets


Good morning,

Today we have a project with pictures from home from my daughter, Catherine. She's our guest blogger today with these darling little table decorations that have so many uses and can be made in colors for any occasion.

My husband and I are at sea for ten weeks and are lucky to have such a great daughter who sends us "care packages" containing our mail and various treats and surprises twice a week. She sent us one of these little lollipop vases and it graces our coffee table. I must admit, I've eaten two of the lollipops, but I carefully rearranged the remaining lollipops to try to cover up for those that are "missing."

We will be home in Cincinnati next month where Catherine, my husband, our two Labrador Retrievers (see Erik and Penny in the Liver Cookie Recipe post), and I will enjoy being a family in the same house together for a few weeks. We look forward to seeing other family and friends while we are at home, too.

Very best,

Lois
--------------------

Candy Bouquets


Materials:
bud vase,
floral foam,
lollipops,
ribbon,
tissue paper

Cut floral foam to fit into bud vase. Wrap with green tissue paper, insert foam and paper into vase. Cut additional tissue paper into squares, approximately 3" x 3". Push lollipop sticks through center of tissue squares, and wrap tissue around the lollipop to form petals.


Stick first tissue paper-lollipop in center of foam. Carefully bend the sticks of additional tissue-paper lollipops to fit around the first "bud" in the bouquet. Insert lollipops into foam until bouquet is full.

Finish with a ribbon around the vase.


----------

I was looking for a little something to take to a holiday business lunch. These bouquets were fun to put together, and fit down into tiny gift bags for a real "gift" look. I used one for a hostess gift at another event. I also think these would be adorable for Valentine's Day, or little "thinking of you" tokens.


I swiped the yellow tissue paper for these from a gift bag that was saved to use again. Waste not, want not. I like the "solid" color bouquets over the mixed colors, and I'm sure it'd be fun to do these for place settings with a theme color.

The lollipops in the pictures are Charms; Tootsie pops would be good too. OK, now I'm hungry...

I'm still new to the candy bouquet thing, and I'm interested to make bigger projects. Also, these little vases are a little top-heavy with 7 lollipops in them. Mom's better at tying bows than I am; she'd get a more professional look. One thing I will say, these little buds seem to hold together pretty well. Almost too pretty to eat... almost! /insert evil laugh here!

Catherine

~~~~~~~~~~~~~~~~~~~~
~~~~~~~~~~~~~~~~~~~~